Torと接続する方法
When OnionShare starts, it will show you a screen asking you to connect to the Tor network.
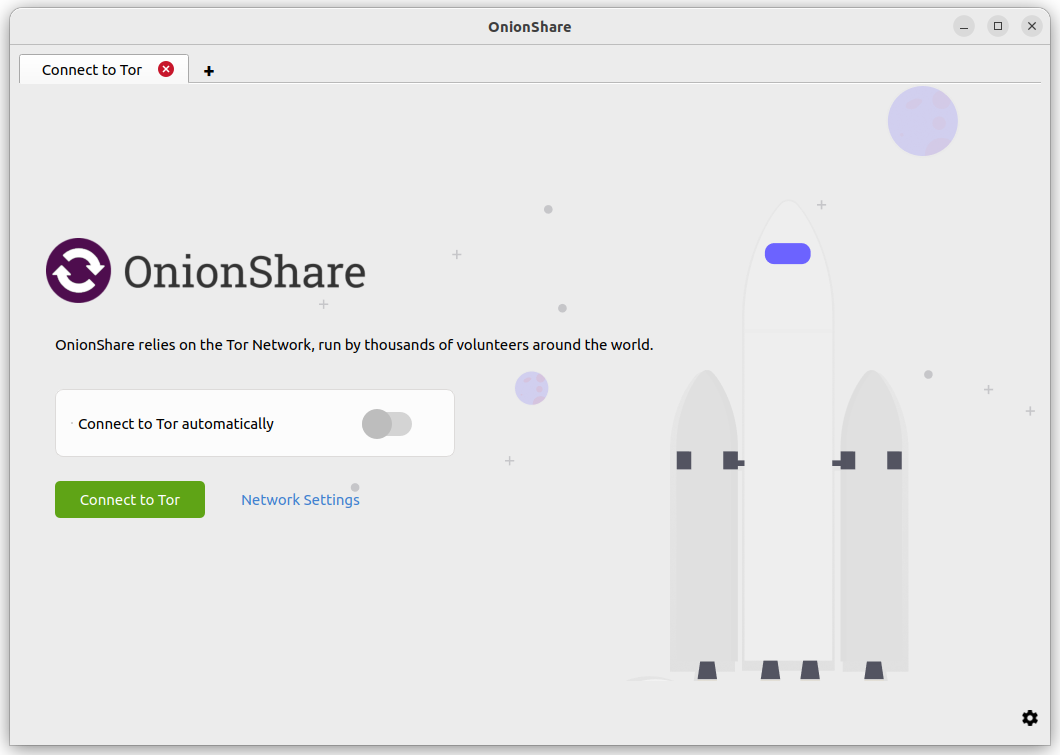
You can toggle on the switch "Connect to Tor automatically" before clicking "Connect to Tor". This means that next time OnionShare starts, it will automatically connect with its Tor connection settings from the last session, instead of presenting you with the connection options. If the connection fails, you can still try bridges or reconfigure Tor via the "Network Settings" button.
You can click "Connect to Tor" to begin the connection process. If there are no problems with your network, including any attempts to block your access to the Tor network, this should hopefully work the first time.
Or, if you want to manually configure Bridges or other Tor settings before you connect, you can click "Network Settings".
Automatic censorship circumvention
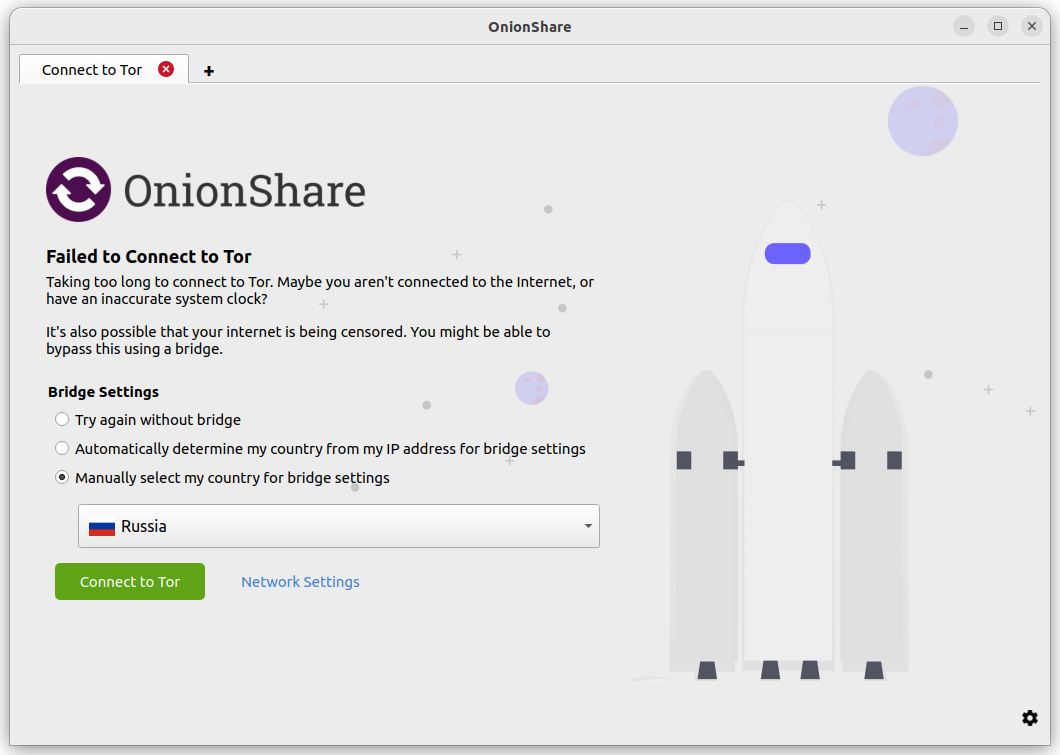
When you click "Connect to Tor", if OnionShare fails to connect, it might be because Tor is censored in your country or on your local network.
If this occurs, you will have these choices:
Try again without a bridge
Automatically determine my country from my IP address for bridge settings
Manually select my country for bridge settings
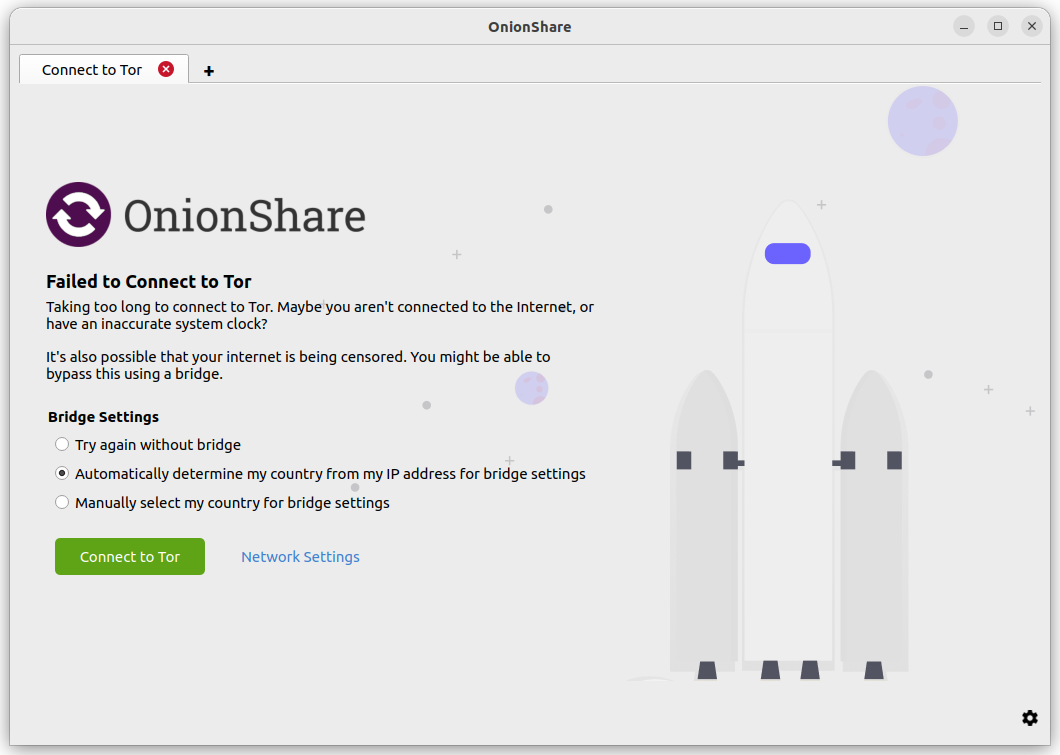
If you choose the "Try again without a bridge" option, OnionShare will retry connecting to Tor like normal, without attempting to bypass censorship.
The other two options will attempt to automatically bypass censorship using Tor bridges. If your network provider is blocking access to the Tor network, you can hopefully still connect to a Tor bridge, which will then connect you to the Tor network, circumventing the censorship. Both of these options use the Tor Project's Censorship Circumvention API to provide you with bridge settings that should work for you. OnionShare will temporarily use the Meek domain-fronting proxy to make a non-Tor connection from your computer to Tor's Censorship Circumvention API. The Meek proxy hides the fact that you are trying to find a way to connect to Tor.
If you choose "Automatically determine my country from my IP address for bridge settings", the Censorship Circumvention API will consider your IP address (yes, your real IP address) to determine what country you might reside in. Based on the country information, the API will try to automatically find bridges that suit your location.
If you choose "Manually select my country for bridge settings", the Censorship API will find the bridges that suit the country that you specified.
How automatic censorship circumvention works
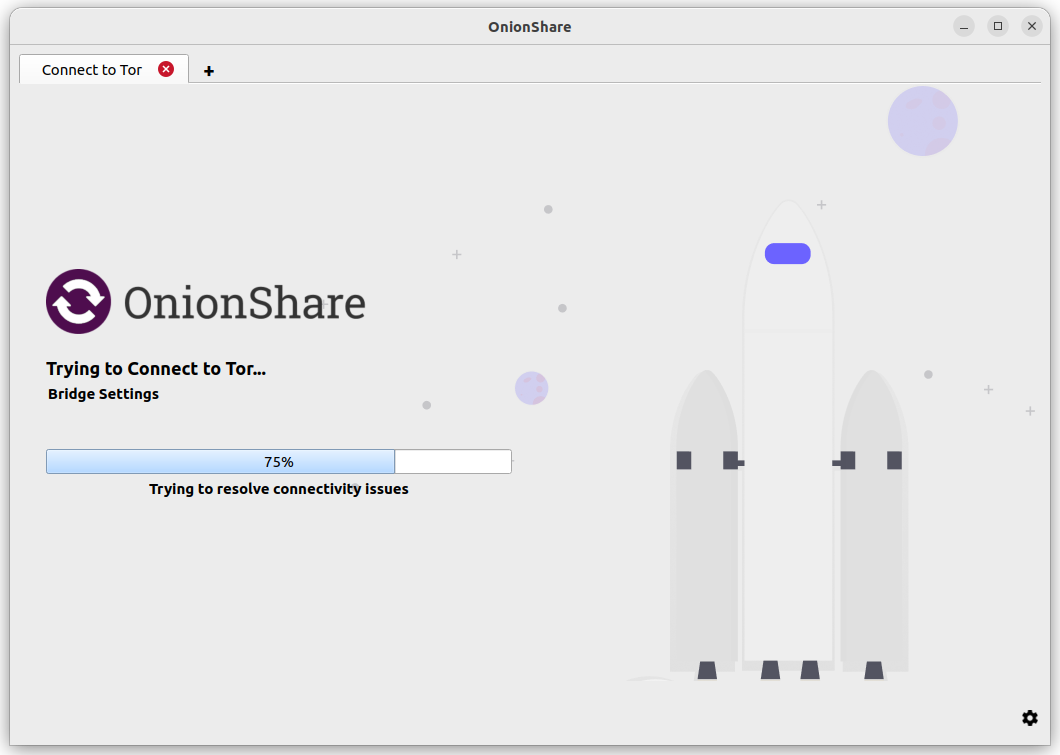
If the Censorship Circumvention API finds bridges that it believes will suit you, OnionShare will try to reconnect to Tor using those bridges. If the API does not find any bridges for your location, OnionShare will ask the API for "fallback" options, and then try to reconnect using those.
If for some reason OnionShare fails to connect to the Censorship API itself, or if the API returns an error message, OnionShare will attempt to use the obfs4 built-in bridges.
It's important to note that the requests to the Censorship Circumvention API do not go over the Tor network (because if you could connect to Tor already, you wouldn't need to connect to the API).
Even though it's hard for an adversary to discover where the Meek request is going, this may still be risky for some users. Therefore, it is an opt-in feature. The use of Meek and non-torified network requests are limited only to making one or two requests to the Censorship Circumvention API. Then Meek is stopped, and all further network requests happen over the Tor network.
If you are uncomfortable with making a request that doesn't go over the Tor network, you can click "Network Settings" (or the Settings icon in the bottom right corner, followed by the Tor Settings tab in the screen that appears), and manually configure bridges. After you save any bridge settings, OnionShare will try to reconnect using those bridges.
Manually configure Tor settings
You can get to the Tor settings by clicking "Network Settings" on the welcome screen, or by clicking the "⚙" icon in the bottom-right corner of the application, and then switch to the Tor Settings tab in the screen that appears.
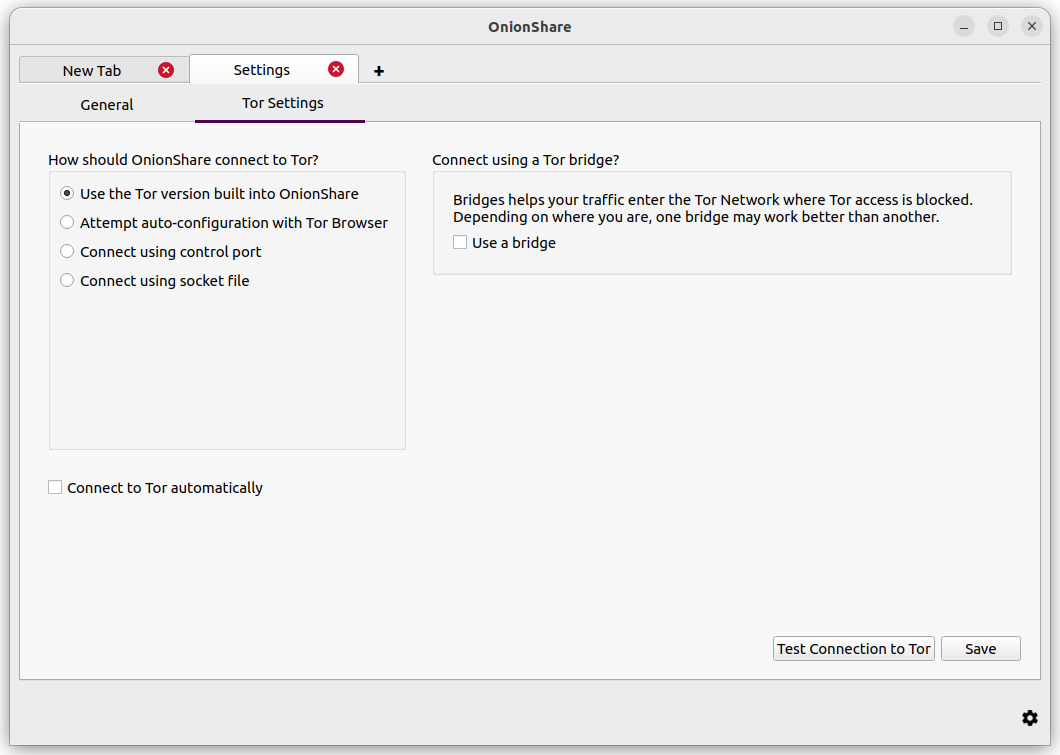
Here are the different ways you can configure OnionShare to connect to Tor:
Use the Tor version built into OnionShare
OnionShareのTor接続設定の中で、これは一番簡単そして確実なデフォルト方法です。こういうわけで、ほとんどのユーザに勧められます。
OnionShareを開くと、すでに設定されてる``tor``プロセスはバックグラウンドに実行されてOnionShareに利用されます。パソコンに他の``tor``プロセスと妨げないので、無事にTorブラウザまたはシステムの``tor``を同時に使えます。
Using bridges
To use a bridge, you must select "Use the Tor version built into OnionShare" and check the "Use a bridge" checkbox.
Try using a built-in bridge first. Using obfs4 or snowflake bridges is recommended over using meek-azure.
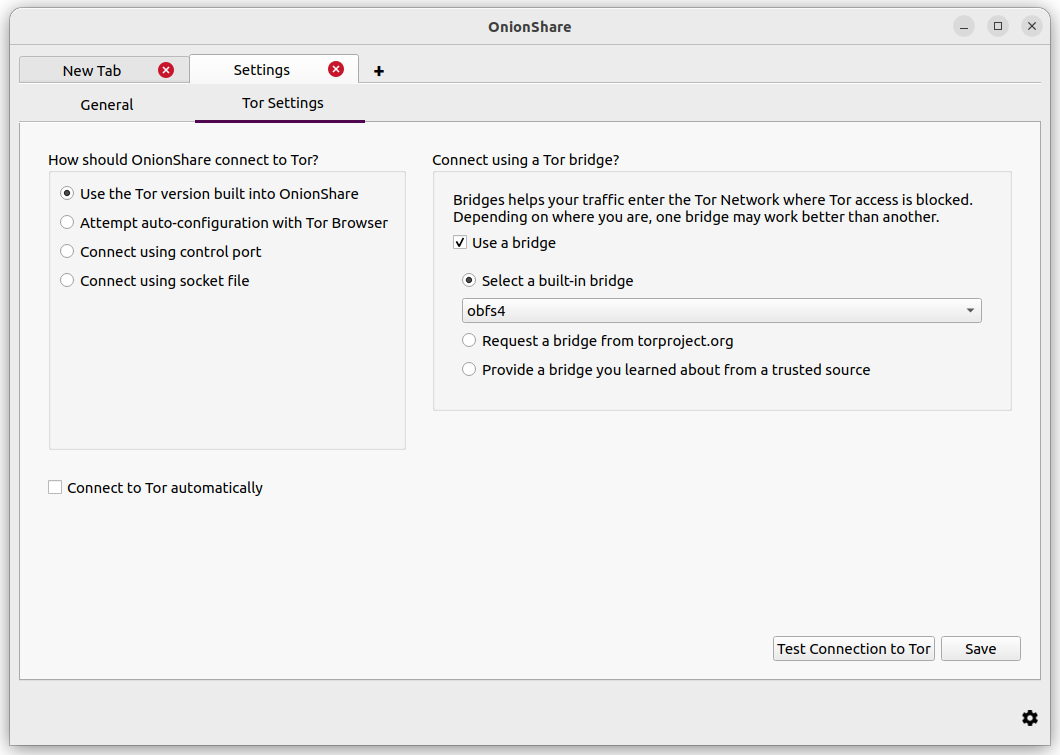
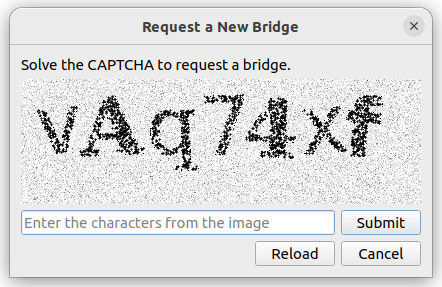
If using a built-in bridge doesn't work, you can request a bridge from torproject.org. You will have to solve a CAPTCHA in order to request a bridge. (This makes it more difficult for governments or ISPs to block access to Tor bridges.)
You also have the option of using a bridge that you learned about from a trusted source.
Torブラウザとの自動的な設定を試す
`Torブラウザをダウンロード<https://www.torproject.org>`_してたら、余計な``tor``プロセスを実行したくない場合はOnionShareがTorブラウザの``tor``プロセスを利用できます。OnionShareを利用する間にTorブラウザを開いたままにしておく必要があることに留意して下さい。
Windowsのシステム``tor``を利用
これはかなり先進の設定です。プレーンテキストファイルの編集そして管理者としてパソコンをいじり方を知る必要があります。
<https://www.torproject.org/download/tor/>`_からTorの「Windows Expert Bundle」をダウンロードする。圧縮したファイルを解凍して、解凍されたフォルダーを``C:Program Files (x86)``にコピーする。解凍されたフォルダー名を「Data」に変えて、その中の「Tor」フォルダーを「tor-win32」に名前を変える。
コントロールポートのパスワードを作る(7語の順序は良いパスワードになります、例えば``comprised stumble rummage work avenging construct volatile``)。次は管理者としてコマンド・プロンプトを開いて(cmd)、「tor.exe --hash-password」を入力してパスワードのハッシュを生成する。例えば:
cd "C:\Program Files (x86)\tor-win32\Tor"
tor.exe --hash-password "comprised stumble rummage work avenging construct volatile"
警告メッセージの後、ハッシュ化パスワードの出力は表示されます(警告を無視しても問題ありません)。以上の例の場合は「16:00322E903D96DE986058BB9ABDA91E010D7A863768635AC38E213FDBEF」になります。
次は``C:Program Files (x86)tor-win32torrc`` に新しいテキストファイルを作成して、生成したハッシュ化パスワードの出力を「HashedControlPassword」を上書きするようにファイルの中に入力する:
ControlPort 9051
HashedControlPassword (the hash you generate from the password you picked above)
管理者のコマンド・プロンプトに、先に生成した``torrc``ファイルを使ってサービスとして``tor``をインストールする(`<https://2019.www.torproject.org/docs/faq.html.en#NTService>`_に説明される通りに)。以下のように:
tor.exe --service install -options -f "C:\Program Files (x86)\tor-win32\torrc"
Windowsに``tor``のシステムプロセスを実行するようになりました!
Open OnionShare, click the "⚙" icon in it, and switch to the Tor Settings tab.
Under "How should OnionShare connect to Tor?" choose "Connect using control port", and set
"Control port" to 127.0.0.1 and
"Port" to 9051.
Under "Tor authentication settings" choose "Password" and set the password to the control port password you picked above.
Click the "Test Connection to Tor" button.
If all goes well, you should see "Connected to the Tor controller".
macOSのシステム``tor``を利用
まずは`Homebrew <https://brew.sh/>`_をインストールして、そしてTorをインストールする:
brew install tor
次はTorをOnionShareからの接続を受け入れるように設定する:
mkdir -p /usr/local/var/run/tor
chmod 700 /usr/local/var/run/tor
echo 'SOCKSPort 9050' >> /usr/local/etc/tor/torrc
echo 'ControlPort unix:"/usr/local/var/run/tor/control.socket"' >> /usr/local/etc/tor/torrc
そしてシステムのTorサービスを実行する:
brew services start tor
Open OnionShare, click the "⚙" icon in it, and switch to the Tor Settings tab.
Under "How should OnionShare connect to Tor?" choose "Connect using socket file", and
set the socket file to be /usr/local/var/run/tor/control.socket.
Under "Tor authentication settings" choose "No authentication, or cookie authentication".
Click the "Test Connection to Tor" button.
全てがうまくいくと「Torコントローラーと接続完了」が表示されます。
Linuxのシステム``tor``を利用
まずは``tor``パッケージをインストールする。Debian、Ubuntu、または似てるようなディストリビューションを使う場合は、Torプロジェクトの`公式リポジトリ <https://support.torproject.org/apt/tor-deb-repo/>`_を使うようお進められます。
次は``tor``プロセスを実行するグループ(DebianやUbuntuの場合は``debian-tor``)にユーザを追加して、OnionShareをシステム``tor``のコントロールソケットファイルと接続できるように設定する。
以下のコマンドを実行してユーザを``debian-tor``グループに追加できます(``username``に実際のユーザ名と書き換えて下さい):
sudo usermod -a -G debian-tor username
Reboot your computer.
After it boots up again, open OnionShare, click the "⚙" icon in it, and switch to the Tor Settings tab.
Under "How should OnionShare connect to Tor?" choose "Connect using socket file".
Set the socket file to be /var/run/tor/control.
Under "Tor authentication settings" choose "No authentication, or cookie authentication".
Click the "Test Connection to Tor" button.
全てがうまくいくと「Torコントローラーと接続完了」が表示されます。